Scope
How can I offer a lifetime service/product to customers without creating a plan?
Summary
Step 1: Click Product Catalog > Charges > + Create Charge.
Step 2: To enable One-time Payments for your Chargebee site, contact support.
Once Checkout for One-time Payments is enabled, click Settings > Configure Chargebee > Checkout & Self Serve Portal > One-time payments > Enable.
Solution
Step 1: Create a Charge
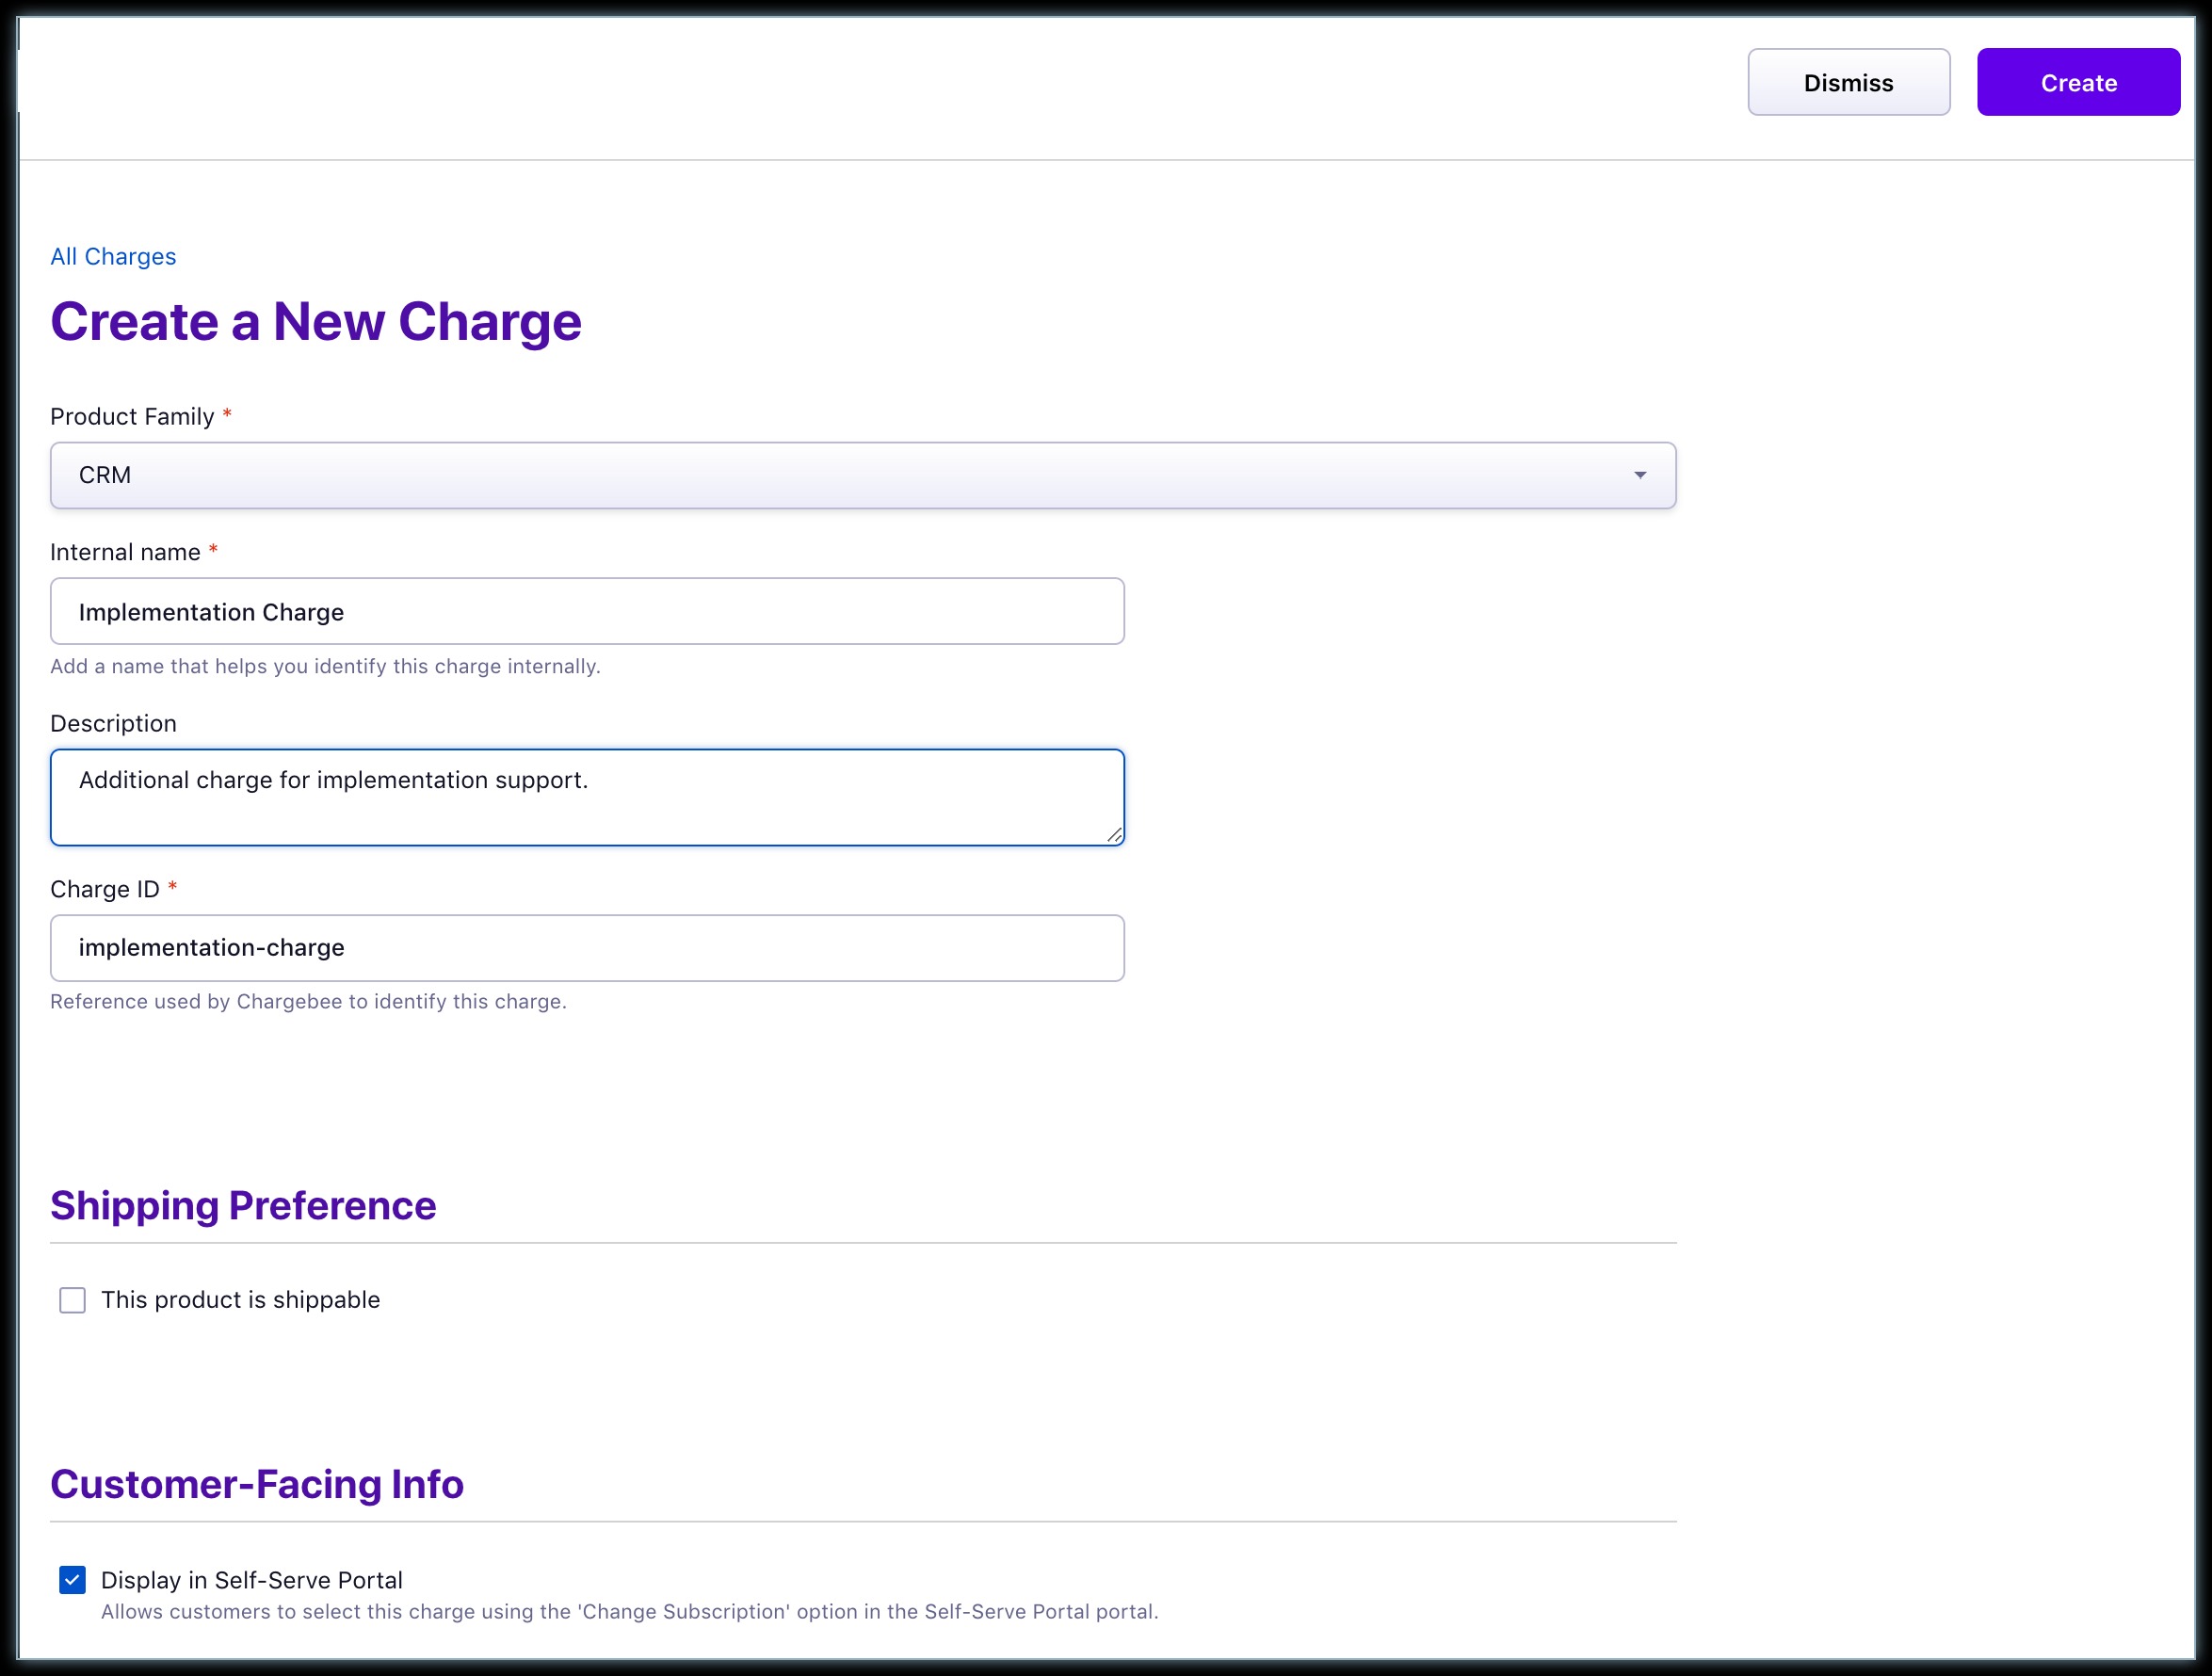
- Click Product Catalog > Charges > + Create Charge.
- In the Create a New Charge page, click the Product Family drop-down and select the Product family to associate this charge to a product family.
Then you can update the Internal Name, Description, Charge ID, Customer-Facing Info, and then click Create.
Defining Price Points for a Charge
Once you create charges, you can start adding multiple price points for each currency. To define a price point for a charge, follow these steps:
Click Product Catalog > Charges. Select the charge for which you are creating price points.
-
On the details page, the Pricing section displays all the currencies that you have configured. Go to the currency that you want to add for this charge, and click Set Price.

-
In the Create a Price Point page, you can modify the basic attributes of the charge's price point such as External Name, Internal Name, and Plan Price Point ID.

In the Pricing section, you can configure the pricing attributes of the price point such as:

- Pricing Model: Choose your preferred pricing model in which you want to charge your customers.
- Price: Based on the pricing model that you choose, you can specify the price for the charge's price point.
-
Under Customer facing info, you can do the following:
 Add a Description & Invoice notes for this particular Charge.

Step 2: Checkout One-Time Payments
To enable One-time Payments for your Chargebee site, contact support.
Once Checkout for One-time Payments is enabled, click Settings > Configure Chargebee > Checkout & Self Serve Portal > One time payments > Enable.
Here's a sample of the configuration page for One-time Payments.

You can implement the one-time checkout for Charges Using Checkout URL, Using Drop-in Script & Using Hosted Pages API.
Refer to a quick demo video link for more information.